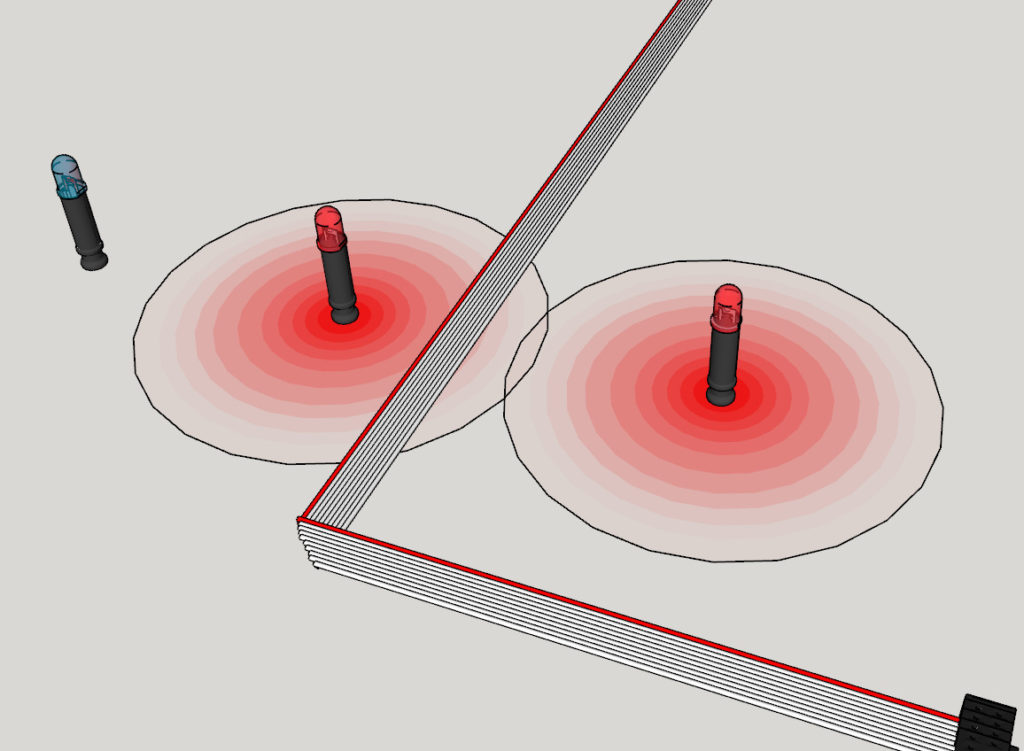
The NearLite system consists of a flat ribbon cable, Nearlite Controller Box, Lite Tags, and power supply. In the starter kit, shown below, The Lite Tags consist of a small round tag board and include LEDs and wires that allow the LEDs to be placed directly on the tag board positioned where needed using the wires.

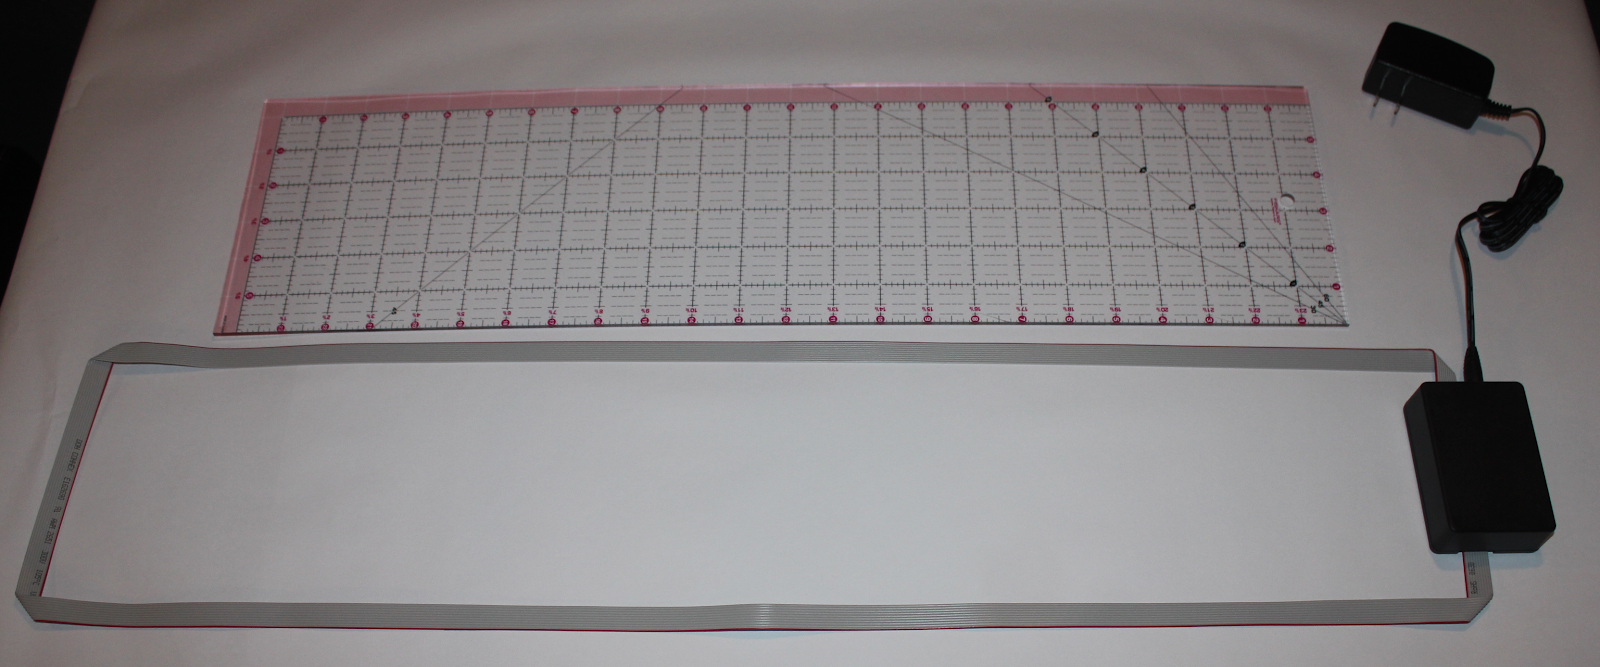
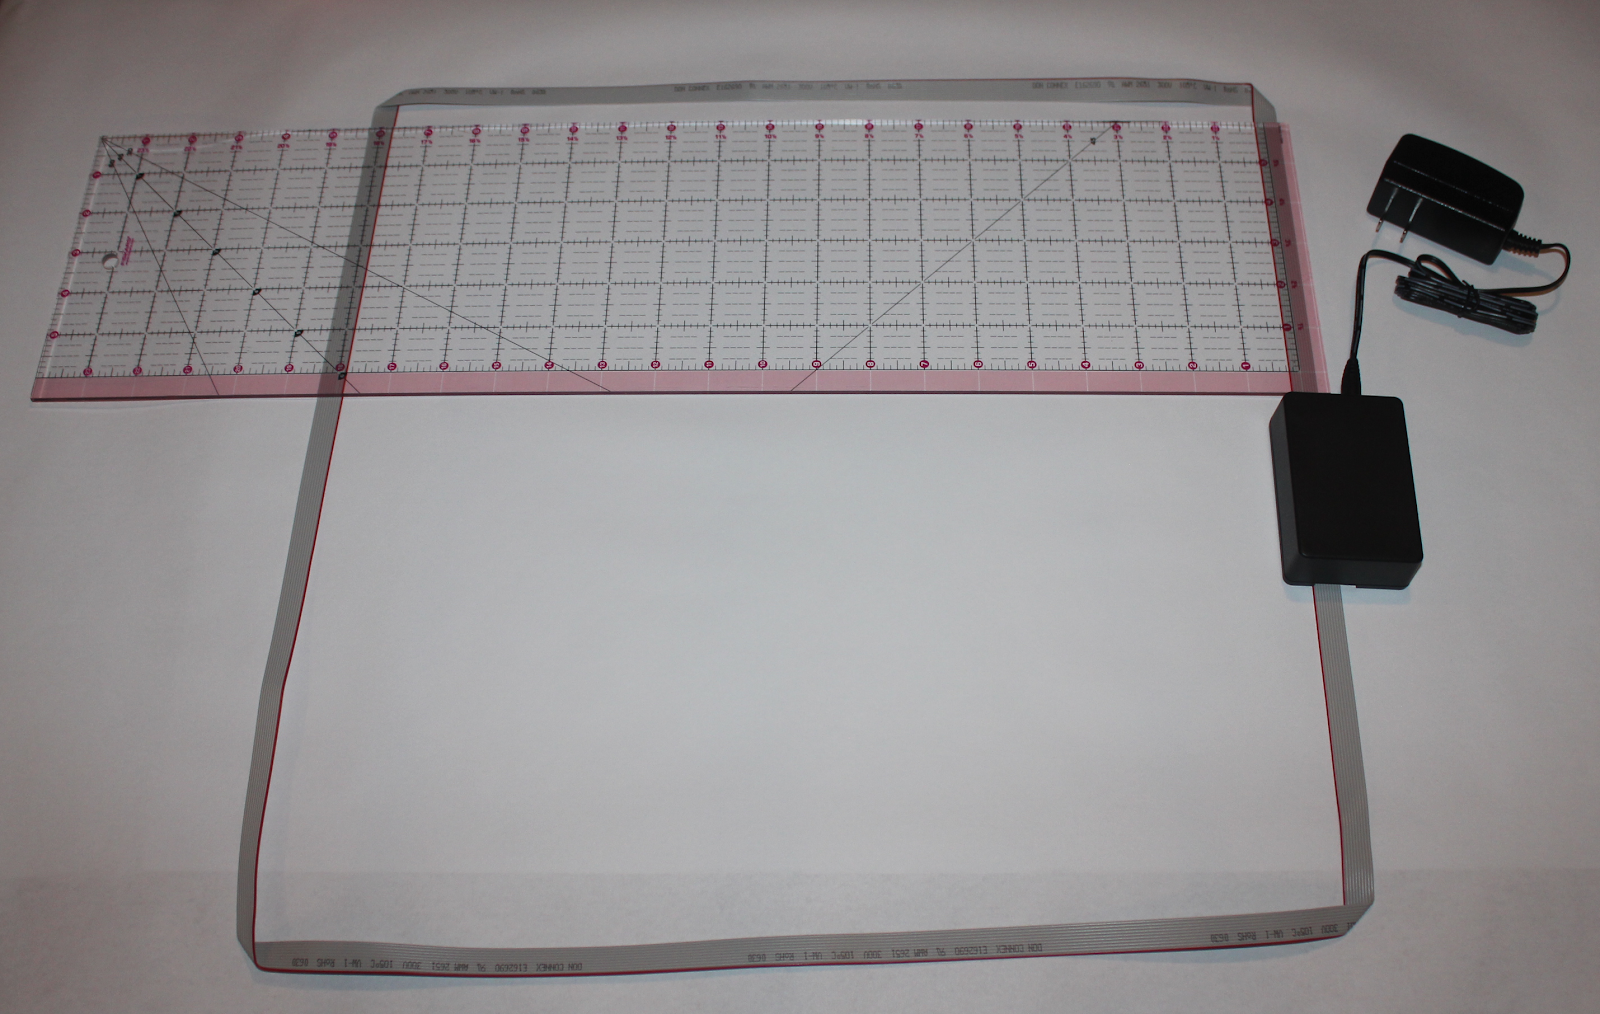
Depending on your controller box model you will arrange your cable in either a 18″ x 18″ square or a 30″ x 6″ rectangle (the ribbon dimensions are important to proper operation of the system). The square system is great for board games, playsets and tables while the rectangular shape is ideal for fireplace mantles and buffet tables.Other sizes and shapes can be made but, a different controller box will be required, please contact us for more information.
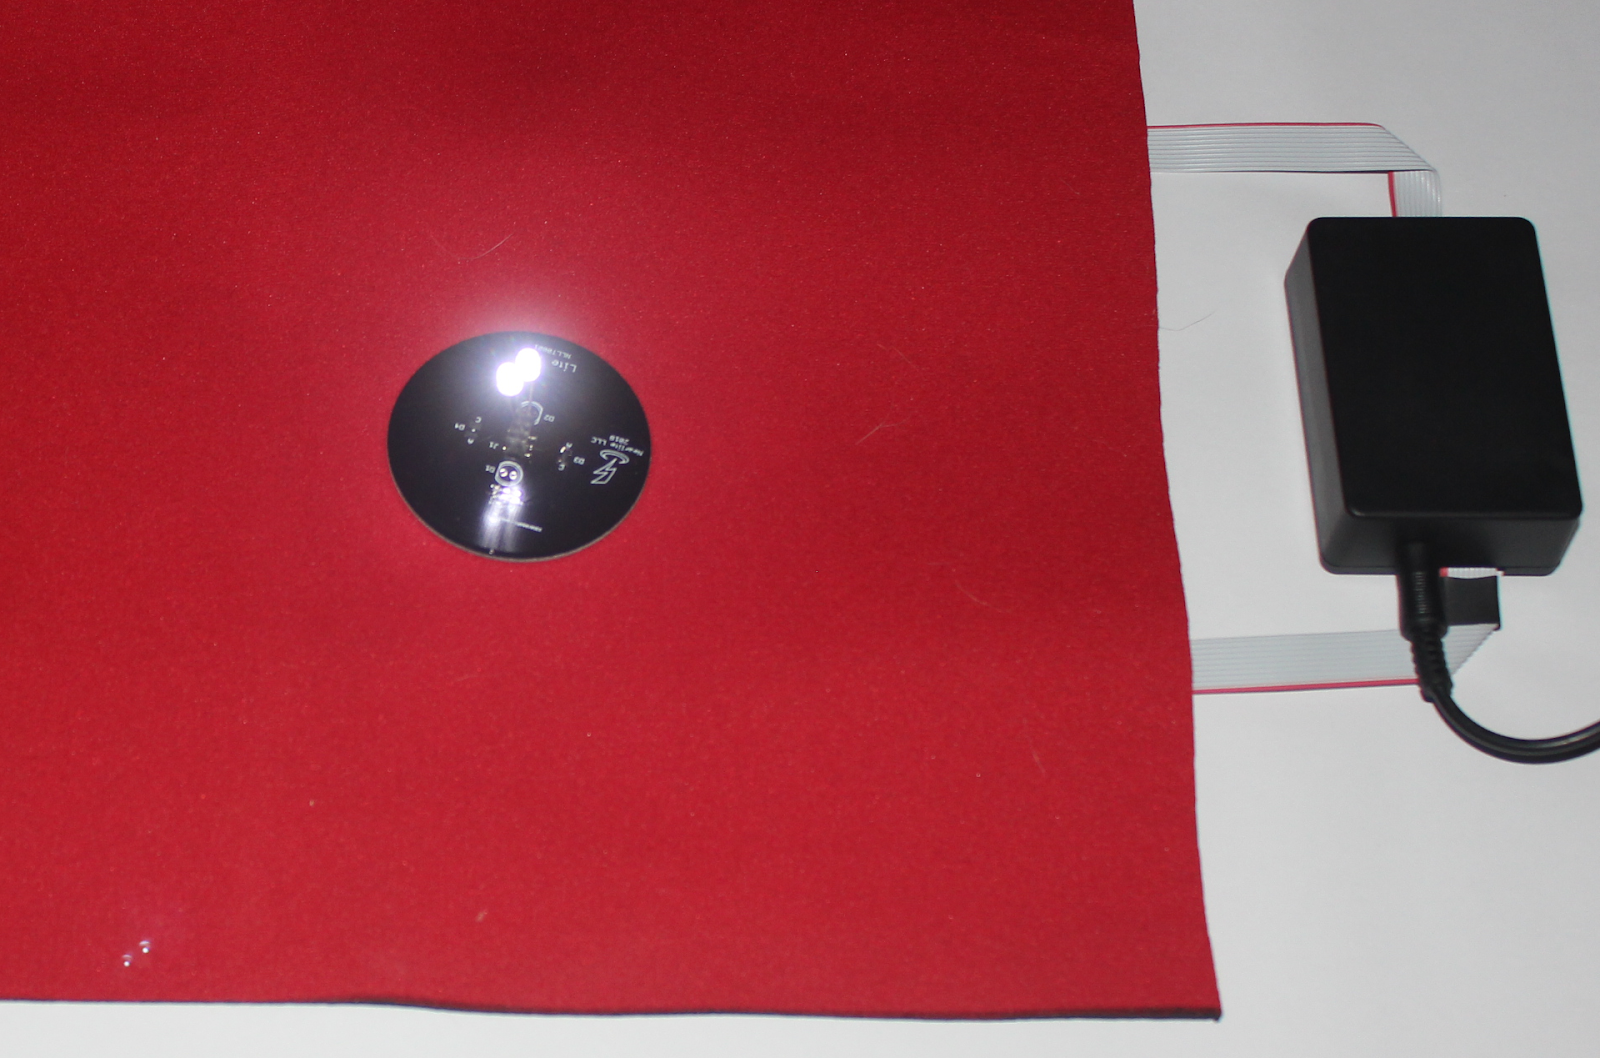
The Nearlite system will work on any non-metal surface such as a table, shelf, floor or fireplace mantle. To make the system portable it can be placed on a piece of plywood, cardboard foam board etc. so that it can be easily moved. To hide the controller box and ribbon cable a piece of non-metallic felt, fabric, plastic etc. can be placed over the system to hide the components. Since the system can power the Lite tags from several inches away the system can even be placed on the underside of a table or shelf so that it is completely hidden from view while still providing power to the Lite Tags.

Nearlite System Setup
The ribbon cable must be placed in a loop of the proper dimensions that correspond to the controller box you are using, either 18” x 18” or 6“ x 30”. Once you have selected a location for the Nearlite system the setup can be done in a few easy steps:
- Using a ruler and pencil to mark an outline of the ribbon cable loop
- Select a location for the Nearlite controller box.
- Connect the ribbon cable and place it along your outline
- Test and adjust ribbon cable position for optimal performance
Using a ruler mark the outline of the ribbon cable loop.

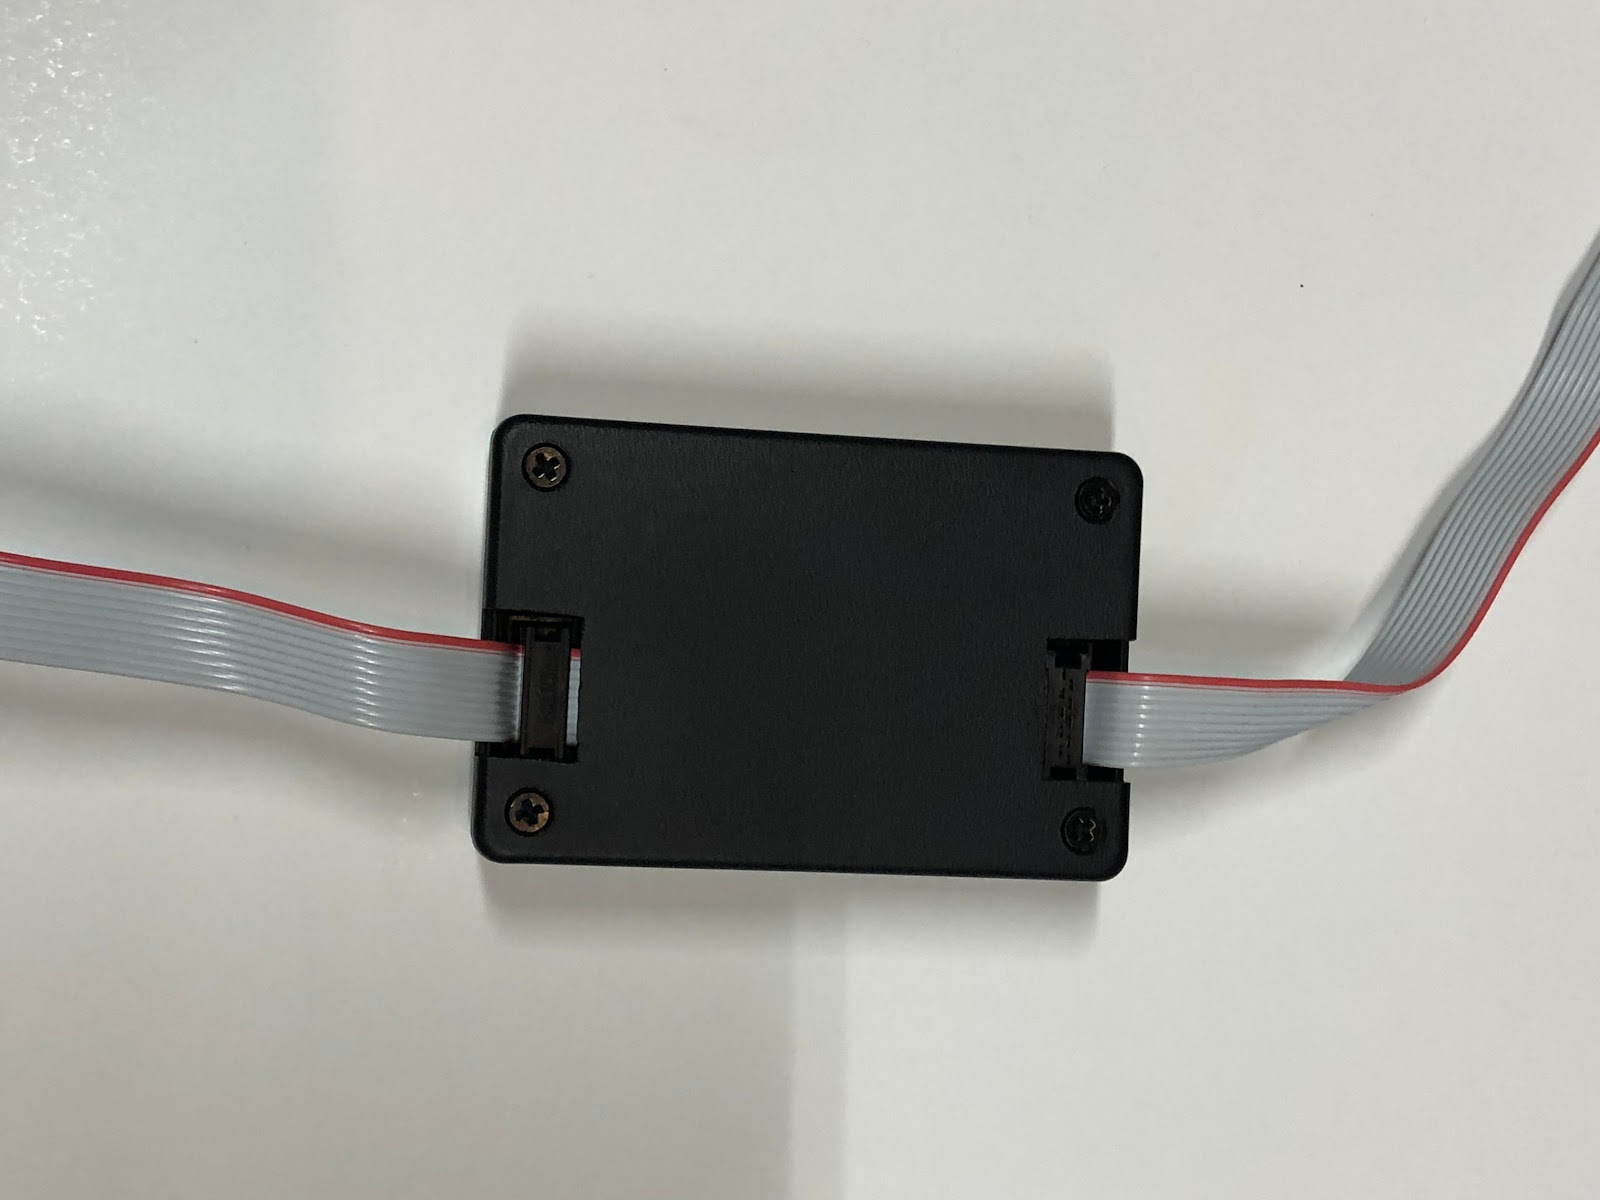
Next, select a location along the loop outline where you want the controller box to be located. Connect one end of the ribbon cable to the Nearlite control box. The Connectors are keyed to ensure they are not connected improperly. The cables should be oriented such that the red line on the ribbon is close to the center of the controller box as shown below.
Once once side of the ribbon cable is connected to the controller box place the box connector side down at the desired location.

Next, run the ribbon cable along the marked outline roughly aligning it to the center of the cable. Use tape to secure the ribbon cable and keep it from moving as you go. Be aware that you will likely have to reposition parts of the cable. The cable does not have to be perfectly aligned to the marked line it just has to be close. Be careful not to use too much tape as you will likely need to remote some if it and slightly adjust the cable to get it to attach to the box.
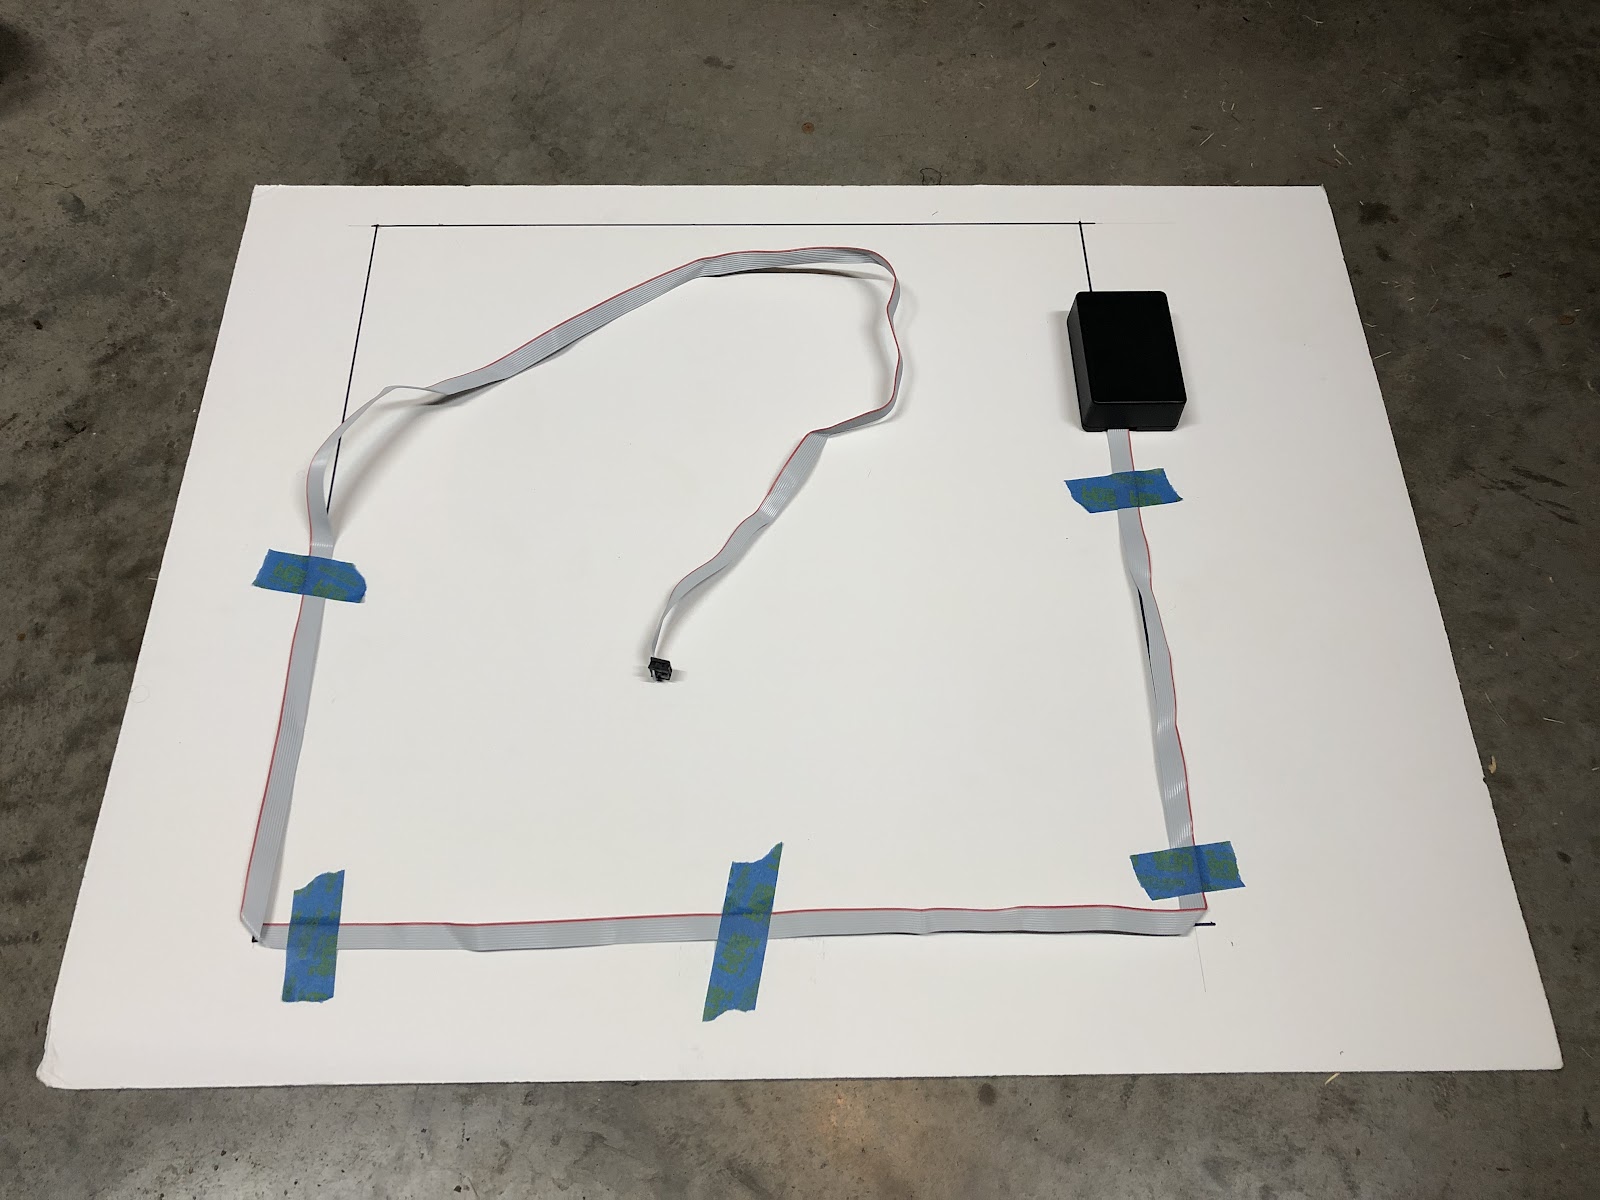
To make the 90 degree bends in the corners the ribbon cable should be folded over itself as shown below.

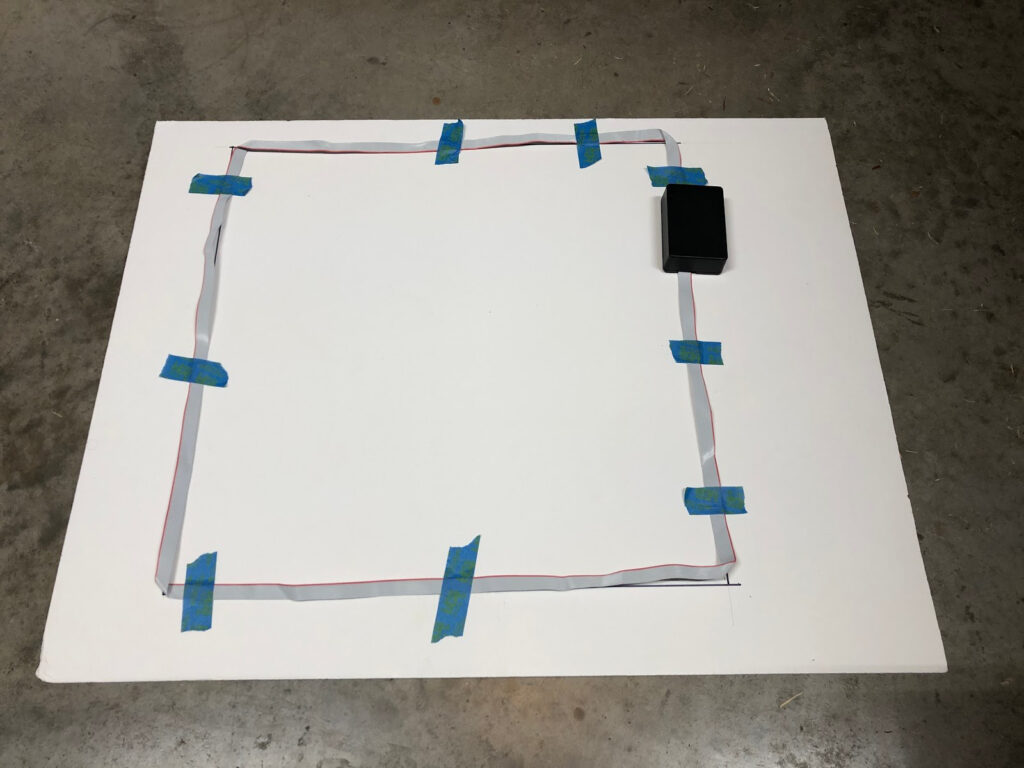
Once you complete the loop, connect the ribbon cable connector to the controller box. When the cable reaches the other side of the Controller Box it should be aligned properly to plug in without the need for twisting. At this point you may need to remove some of the tape and make adjustments to the ribbon cable loop.
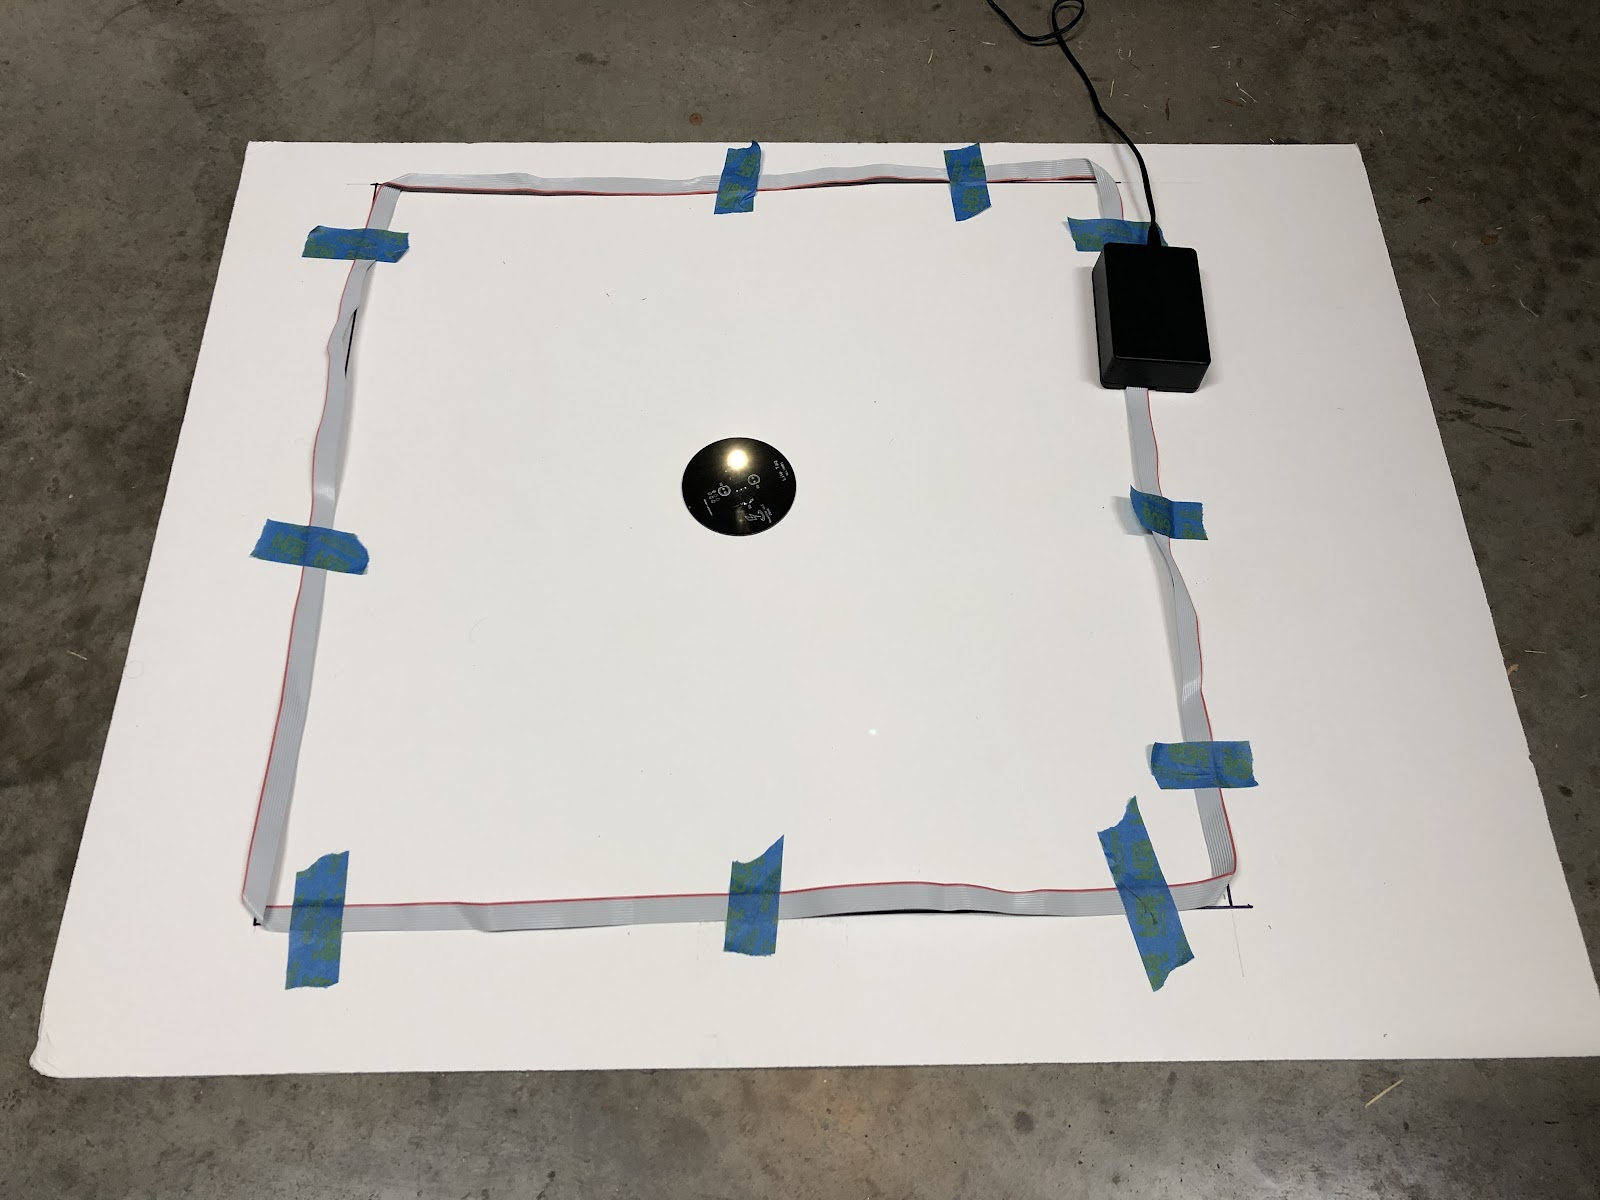
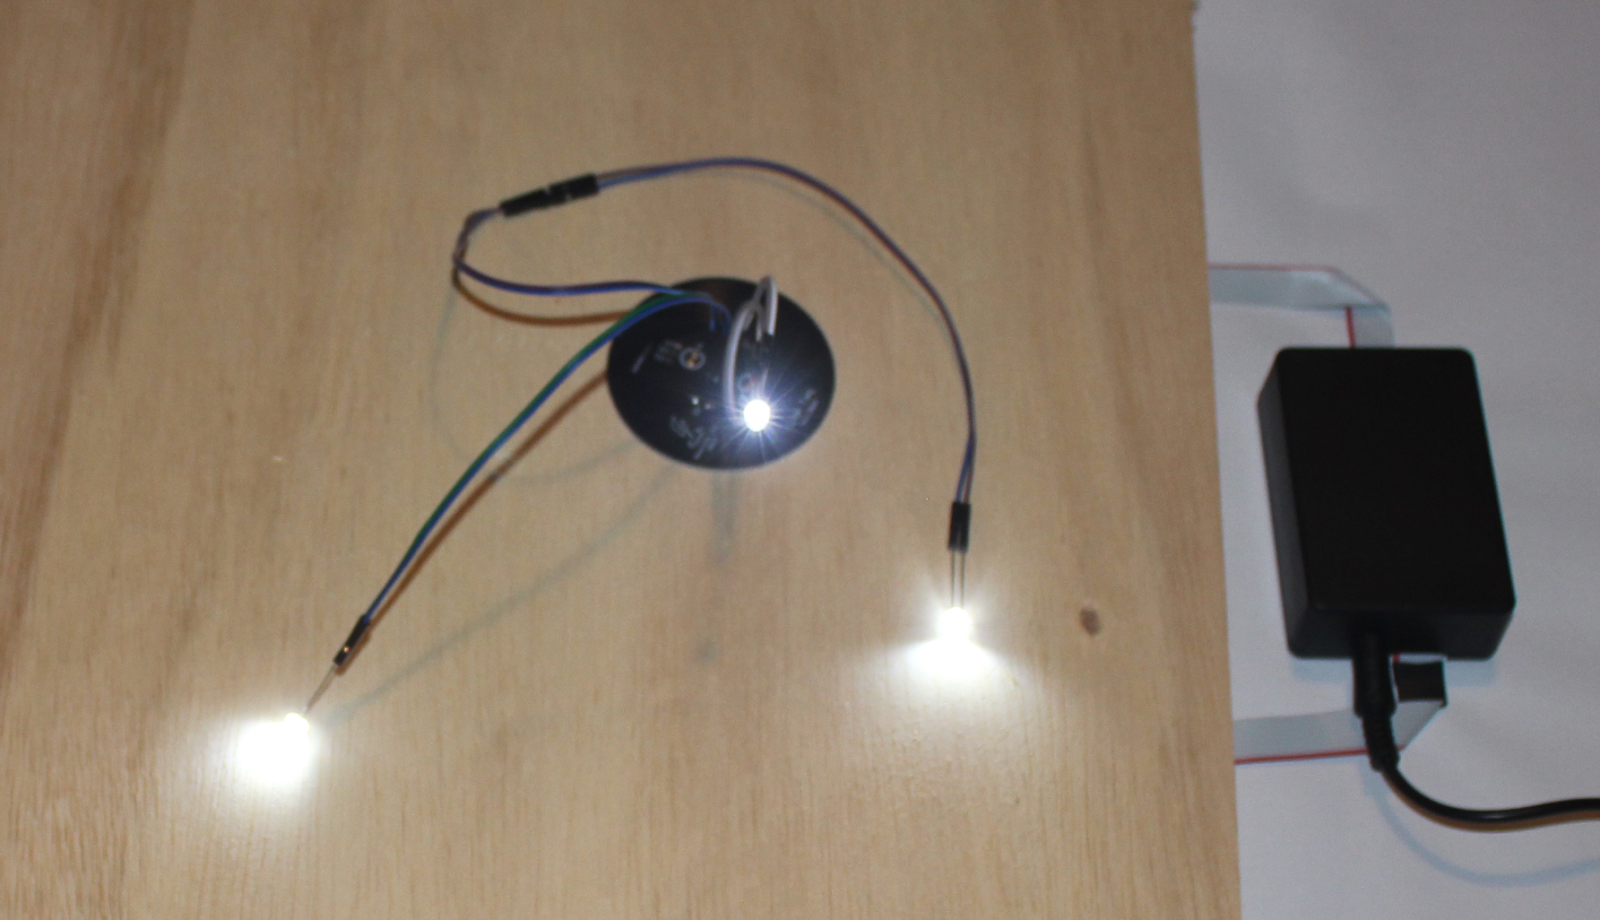
Connect the power supply to the controller box and place a Lite Tag with LED in the center of the loop. The Lite Tag should illuminate.

To maximize brightness of the Nearlite system take one side of the loop and move it slowly in and out to increase and decrease the area of the loop while watching the Lite Tag and make adjustments with the goal of making the Lite Tag as bright as possible..


When the Lite Tag reaches its maximum brightness secure the ribbon cable to the surface and the setup is complete. If desired add more tape to secure the ribbon cable and controller box in place.
Lite Tag Setup
There are different models of light tags, but they fall into two main categories, the self contained light tags and customizable light tags. The self contained tags are really nice out of the box. They come in different colors and are small enough to be embedded into objects. The LEDs on these tags are fairly ridged but can be bent somewhat.

[show different color tags lit up maybe with the LED pointed in a direction.]
The custom light tags require a little setup, but are more flexible. The custom tags consist of a small circuit board, LED and extension wires. The circuit board has a socket capable of connecting up to 3 LEDs. if the LEDs need to be positioned away from the circuit board, the extension cables can be used. The user can update the light tags with different LEDs and different size extension wires if desired. experiment with different LEDs and even different extension cables to get your desired effect. The LED polarity does not matter as long as the LED is connected as shown below.

Up to 3 LEDs can be connected as shown below
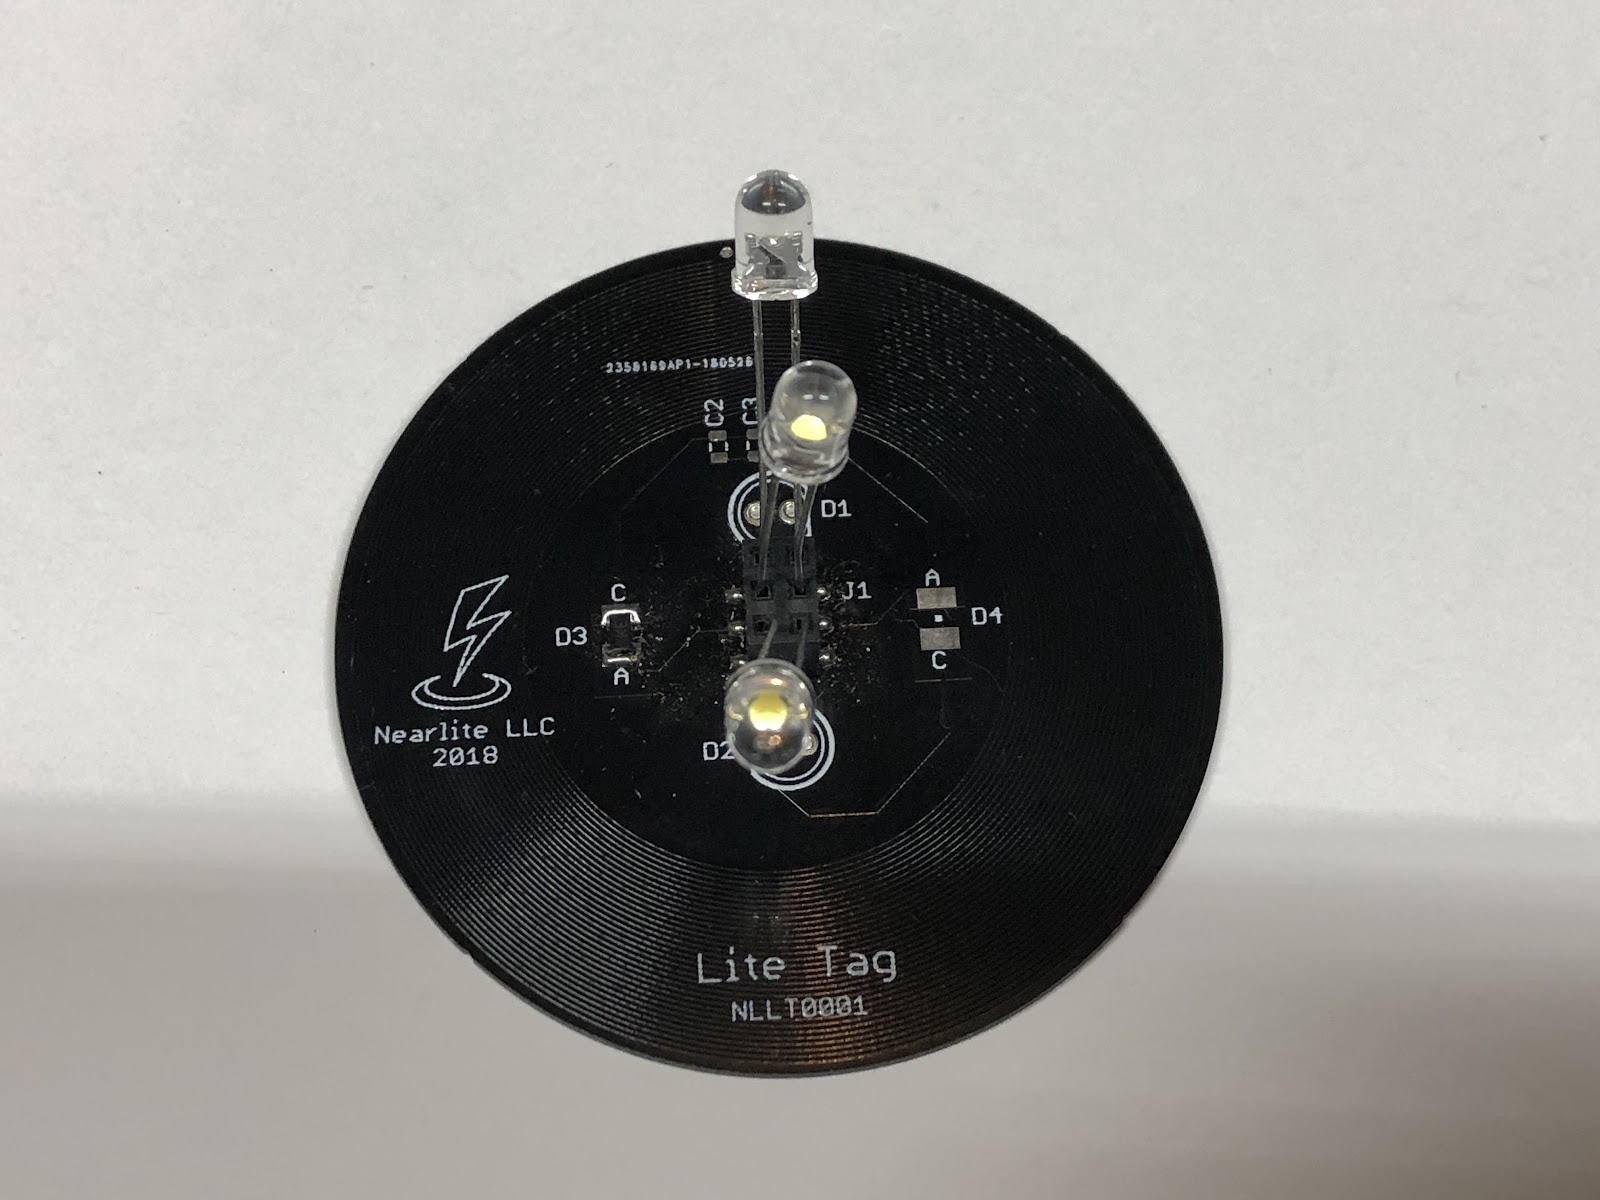

Not all LEDs have the same efficiency, some LEDs may not be as bright as others. changing the length of the extension cable and the cable wire size will also affect the LEDs brightness.
Tag Operation
Connecting the power supply to the Nearlite Controller turns the system on. When the system is on, placing a Lite Tag inside the loop made by the ribbon cable will illuminate the Tag. the Lite Tag will also illuminate a short distance outside the loop.